Home >> Video Tips >> Convert HEIC to JPG
How to Convert HEIC to JPG

“what a workable tool, it's really worth trying." more >>
“what a workable tool, it's really worth trying." more >>
HEIC, short for High Efficiency Image File Format, is a new image container format and used by default on new photos with iOS 11 instead of the previously ubiquitous .jpeg. As it’s a new container format, there will be some incompatibilities along the way. So if you’re rather go back to shooting JPG(JPG and JPEG is essentially the same thing), then this post are what you really need. In this post, we will show you 4 workable ways to convert HEIC to JPG files format for your iPhone X/8/8 Plus/7/7 Plus.
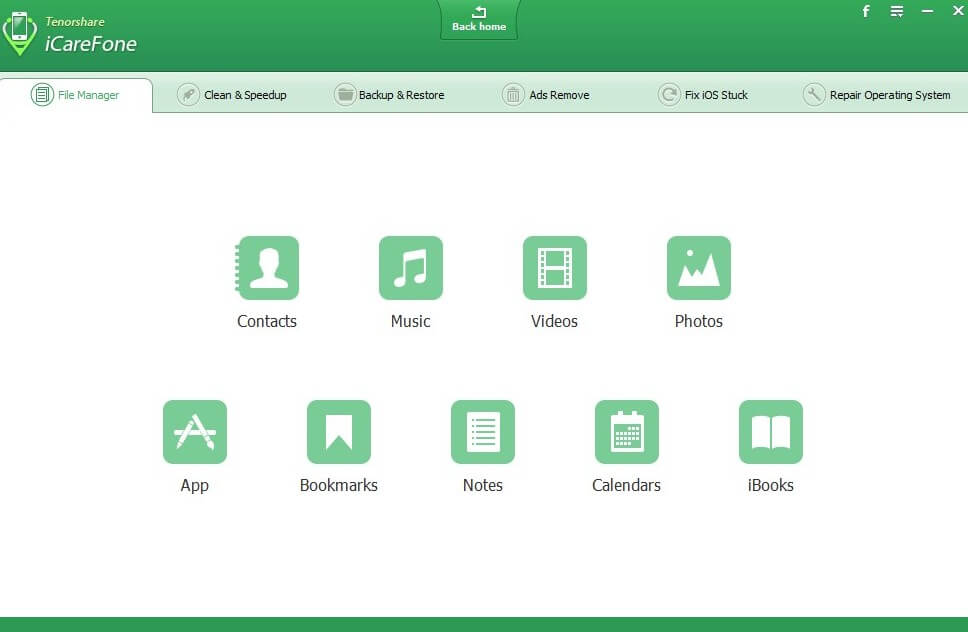
To convert .heic images to .jpg file format whilst ensure no definition loss, you can use a third- party iOS file manager tool—Tenorshare iCareFone. With iCareFone, you are allowed to preview HEIC photos, which cannot be opened in Windows explorer. Also, it can transform HEIC to JPG when transferring photos from iPhone to computer. Get HEIC to JPG converter app iCareFone now and follow the steps below.
Step 1: Click File Manager from the main interface after connect your iPhone to computer, then select Photos from the 9 file types displayed.
Step 2: Locate the target photo album. Then select the HEIC photos you want to transform Click “Export”.
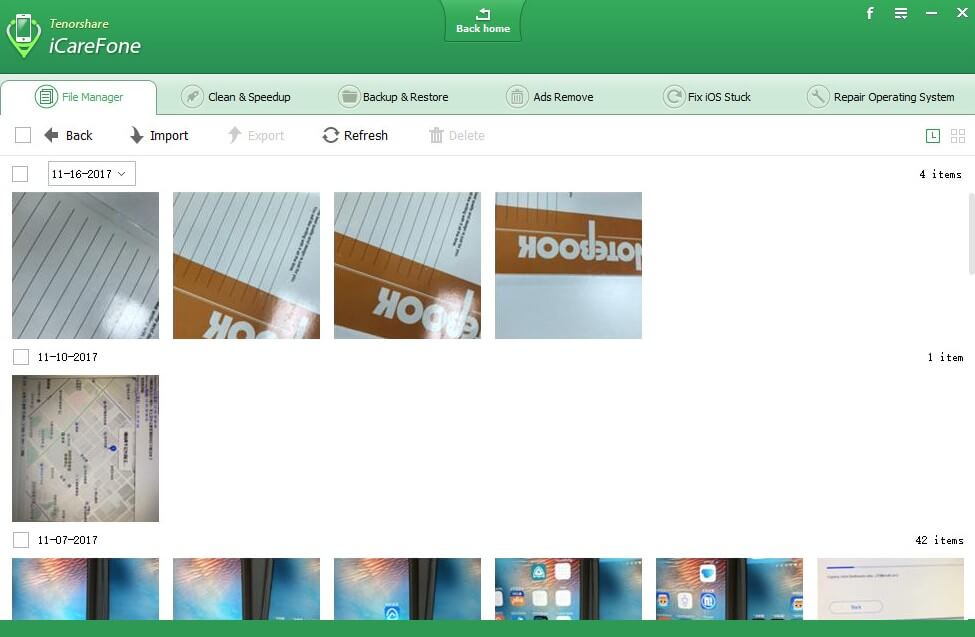
After all these done, all your HEIC images will be converted to JPG on PC/Mac automatically after exporting.
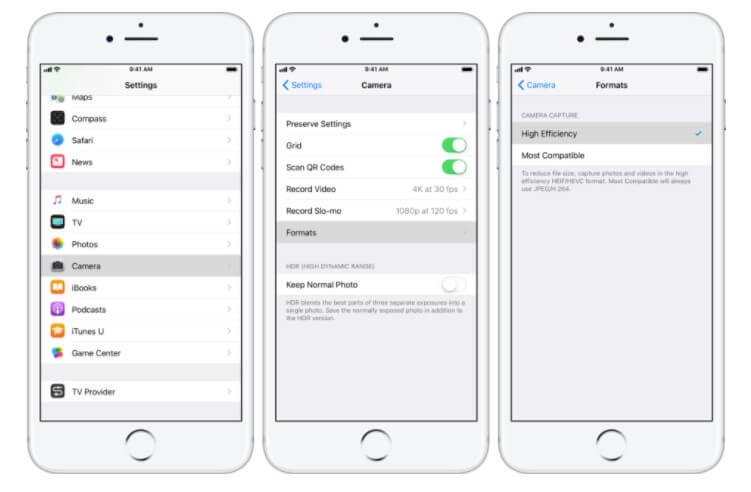
The most straightforward way to change the HEIC file to JPG is turn off the high efficiency, this will force iOS 11 to store all images as JPEG and stop iPhone from saving your photos in HEIC once and for all.
To do so:
Go to Settings >> Camera>> Formats>> Select Most Compatible under CAMERA CAPTURE. After the setup done, all your captured photos will be saved as JPEG.
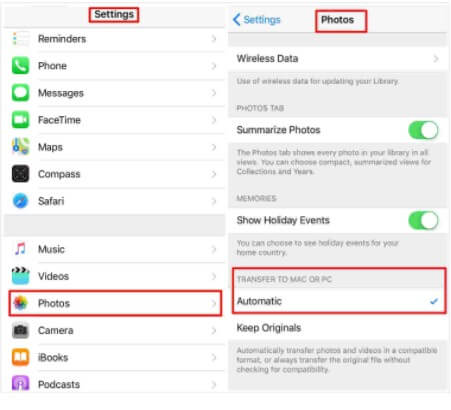
Actually, iOS 11 allows you to convert HEIC to JPG automatically when transferring HEIC images to Mac or PC, you just need to enable automatic transfer without using any HEIC to JPG converter. To do this,
On your iPhone, open Settings >> Photos>>Transfer to Mac or PC>> Automatic under TRANSFER TO MAC OR PC.
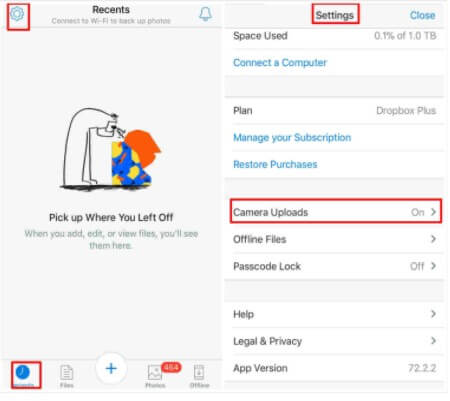
You may not know that Dropbox can accept HEIC photos now, it provides users the option to upload photos saved as HEIC (.heic) or JPG (.jpg). You can set to upload HEIC and save it as JPG, then HEIC pictures will be converted to JPG automatically during upload. You just need follow the steps below:
Open the Dropbox app, hit the Settings (gear icon located at the upper left corner),
Tap Camera Uploads. Then choose Save HEIC Photos as and choose JPG as upload format.
This is all about how to transform HEIC to JPG. Using iCareFone will ensure you no definition loss during and after the conversion compared to other 3 solutions. So, I strongly recommend you to give it a try. But, I also would like to emphasize if you’re not having issues, then it’s worth keeping the high efficiency mode enabled to save space.